Autumn <3

fullsizeoutput_333

I recently discovered my love for autumn, the colors, the rain…. Halloween … am I right? So yesterday I felt the Autumn hit me right in the face, the leaves are changing colours and falling off the trees, the wind is picking up and it’s been raining non stop for a week. I’m not a big fan of the weather changes but I kind of secretly love them. When it’s summer I can’t stand the heat, in winter I cant deal with the cold, so spring and autumn are my preferred seasons. In honour of this slap in the face I wanted to do a Autumnal makeup look with some interesting access pieces. Keep in mind that I used a eyeshadow palette that I only use for sfx makeup because I really don’t like it, I just don’t  have the colors I need in other brands. It turned out great though.

SKIN

Moisturizer – Egyptian magic
Loréal – True match foundation 1.5.N Linen
MAC Mineralize concealer (not sure what colour)
Makeup store – Loose powder in pale
Makeup store- brow pomade in brunette
Kryolan Lip ‘N cheek -Hibiscus
MAC Lipstick- Antique Velvet
MAC Lipstick – Pure Vanity
MAC Lip and cheek colour – Blind Score
Rose cheek pop blush in coral
MAC eyeliner pencil – Smolder
Rhinestones

fullsizeoutput_339

EYES

MAC Paint Pot – Bare Study
NN Cosmetics Palette- Yellow #1,2 & 4/ Orange #1, 2, 3 & 4/ Green #1 &5/ Red #6
Morphe 35N – #31
AOA False Lashes – Luella
Maybelline eyeliner pencil – Vibrant gold
Lorèal false lash superstar mascara

If you are confused by my palettes I go through them right HERE

fullsizeoutput_335

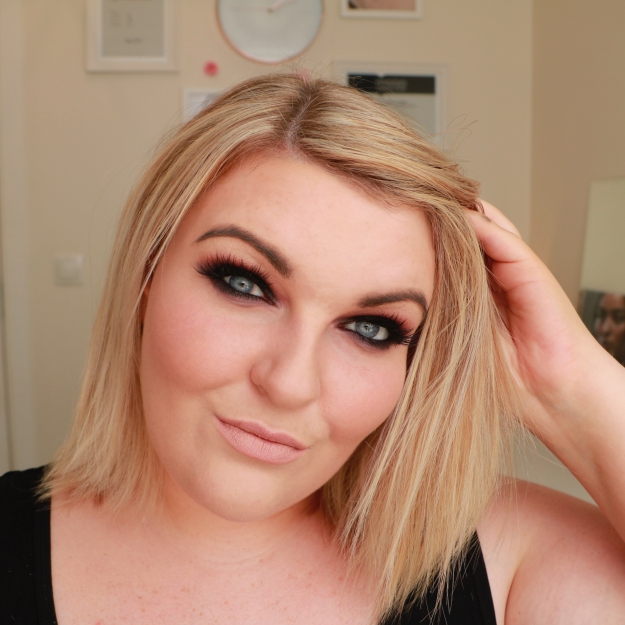
I started with my foundation which is what I always do unless I’m using very dark colours or glitter, I used a dry Real Techniques complexion sponge to pat my foundation on my skin,

then I used the Mac concealer on problem areas and under my eyes. Next I patted the Kryolan lip and cheek product on my lips and cheeks *haha* with my fingers,

then I filled in my brows and set my foundation with the powder.

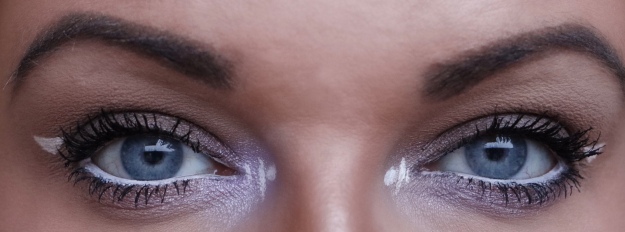
Next I did the eyes, I started by blending my paint pot all the way towards my brows then I used the orange shades in my NN palette to shade the eyes, lightest shade in my tear duct, medium shade on my lid and the darkest one in the outer corner and blended in the crease, to darken it a little bit more I used the dark maroon #35 shade in my my morphe palette. I mixed the yellow #2 and the orange #2 & #3 to do my under eye. Then I lined my waterline with the gold eyeliner and applied mascara and Lashes.

fullsizeoutput_337

Believe you me! We are not done here! 

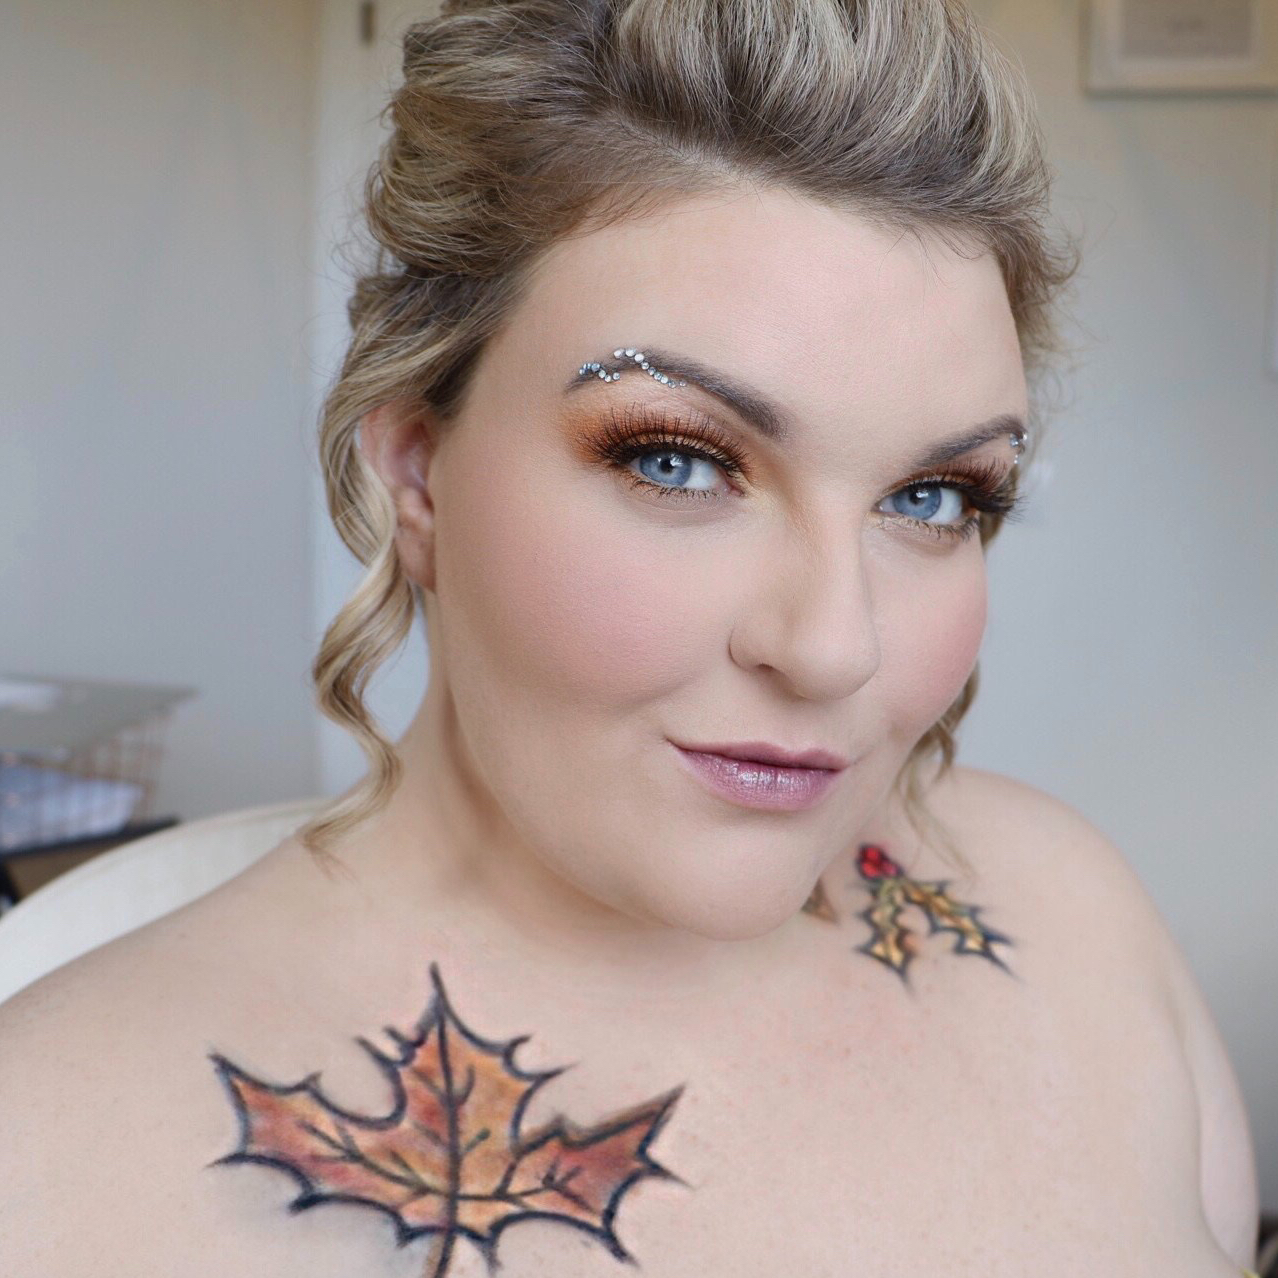
If you don’t know me well, then I’m sorry for you, I’m great…but in all seriousness I am a bit too extra…as if the shimmery orange makeup wasn’t enough I needed something MORE! Thats where the rhinestones come in hand. I glued them on my eyebrows with duo eyelash glue, I tried to arrange them in such a way that they looked like they were going in a spiral around my brows, This took a while to do and it is a bit of a fuss but it is slaaaaying!
Then I did my lips, first I mixed the pale peach colour (Pure vanity) from my MAC Vibe Tribe collection and a tiny dot of the MAC Antique Velvet together, just to darken it a tiny bit and applied on my lips, then I went in with my deep purple MAC lip and cheek colour, I wanted a faded look on that, so I concentrated on having the colour opaque in the middle and then feathered it out towards the edges.
Now to the accent pieces…no the spiral rhinestones weren’t enough! OK! I wanted something more autumnal, I was really happy with my look but I just wanted more arty feel to it. I tried to draw on myself but it turns out that I’m not so good at drawing. So I asked Adam to draw the outlines of leafs on my chest and neck, after that I smudged the outlines and filled in the leafs with mixes of the colours that I listed above.

fullsizeoutput_33b

That is all for today, Hope you enjoyed this look, Let me know what your favourite things about autumn are and if you’d like to see something specific let me know 🙂

XoXo

Ágústa Sif

Egyptian Magic Review <3

If you want your foundation to look great your skin must first be great.


A little bit about my skin before I go in to this review.
My skin is pretty oily on the T zone so I’m prone to getting pimples on my nose and chin, but my skin gets dry on the cheeks and forehead sometimes. When I get pimples I can be sure that once the spot has popped it will become a bleeding sore, thats just how it has always been, I get a spot, it pops and I end up with a gaping sore for the next 2 months, my skin apparently doesn’t heal very fast. I also get a lot of milia/milium cysts around my eyes, lips and on my cheeks. Milia is trapped keratin under the surface of the skin so it appears as small white bumps, and let me tell you they are not easy to get rid of, you can’t really squeeze them, and if you don’t they just stay there. So I have to poke a needle through them and then squeeze them out, and yes I end up with red patches and sores that don’t heal for 1-2 months.

Let’s go over how I found out about Egyptian Magic!
I think it was about a year ago that I saw a video on youtube about a review on Egyptian Magic, I somehow got sucked in to the screen, watching these for hours and this so called magic cream was interesting me beyond believe. I am pretty familiar with the beauty market in Iceland and I had never seen this cream here before so I went online and looked for it, It is a pricey cream! especially when you have to have it shipped from the other side of the world, I really didn’t want to pay all this money for a little jar of some cream I might not even like! So I forgot about it

What is Egyptian Magic?
It is an all natural, that means it has no additives, preservatives, fragrances, chemicals or parabens, oil, that looks solid in the jar but once you rub it between your hands it turns in to a liquid oil. The company makes no medical claims about their product but their many testimonials are used for this list found on their website. I put a little [X] after the ones I have personally tried.

  1. Moisturiser [X]
  2. Healing burns [X]
  3. Treating cuts and Scrapes [X]
  4. Fading Scars
  5. Eczema & Psoriasis Relief
  6. Hair conditioner [X]
  7. Lip Balm [X]
  8. After Shave
  9. After Sun Lotion
  10. Vaginal Moisturiser and Lubricant
  11. Hand and Cuticle cream [X]
  12. Makeup remover [X]
  13. Eye Cream [X]
  14. Massage balm
  15. Tattoo Aftercare
  16. Diaper Rash
  17. Pregnancy moisturiser
  18. Makeup Primer [X]
  19. Hydrating Face Mask [X]
  20. Cracked Heels and Elbows

Where Did I Get my hands on Egyptian Magic?
Then came Costco *insert angels singing*… Costco opened its first warehouse in Iceland in May 2017, I am a huge fan of Costco, its affordable AND it brings products that no one knows about to the country….one of them being EGYPTIAN MAGIC! The first time I seen it, I didn’t buy it because I thought it was too expensive, but then I figured out that in the pack you get 1 big jar and 1 small jar, for the same price as if I would have bought the small jar online and had it sent to me. So I looked for it the next time I went there but I couldn’t find it, I didn’t see it again until my fourth time to Costco and decided to get a pack so I could finally try this cream. and boy oh boy!

How did it work for me?
I didn’t really know what the company claimed the cream could be used for until I started researching for this blog, I just wanted a good moisturiser really. I had just gotten rid of 3 milia bumps on my cheek 1-2 days prior to buying and trying the cream for the first time, and yes I had a very red cheek with bleeding spots. I tried the cream for the first time the same day I bought it and I was surprised it was more of an oil than cream, but oh well I am willing to try mostly anything once. The first thing I noticed was how hydrating it was, my skin didn’t feel dry at all, but not oily either, it just felt really nice and I felt like my skin was benefitting from this creme. Around 2-3 days later I noticed that my red cheek had gone down by loads and I couldn’t see any sign of 2 of the 3 milia bumps I had previously popped! I was already impressed, but I couldn’t just go recommending it for everyone just because of this one thing, so now I’ve used this creme for about a month and I really like it, yes I have noticed a few cons like the product not sinking in to the skin very fast, so it sits on your skin for a long time and like with any oil it feels very greasy for the whole time, but other than that I think its great.

Pros:
Hydrating
Smooth Skin
Sores, cuts and scrapes heal faster
Soothes burns
Great deep conditioner for hair
Doesn’t break me out

Cons:
Sticky feeling on skin for a long time
Oil.. not cream

Thank you all for reading! I want to know if you have heard of this cream, have you tried it and what do you think? comment your thoughts in the comments below and lets have a discussion.


XoXo

Ágústa Sif


Sultry Smokey Eye <3

Now we’re entering the deep end of the pool, and although I used to take loads of swimming lessons… and work at a pool…I am NOT the best swimmer out there.

I have talked about it before and I will again, I have always passionately disliked dark eyeshadows, especially black. I always had a hard time using black shadows, applying, blending, the whole shebang has always been very difficult for me. I also never liked dark eye looks on me, I felt like they made my eyes look smaller, tired and just evil in some strange way hah! The darkest I would go was a chocolate brown so you always saw a pretty neutral, light pretty look. Well I have been challenging myself to practice my usage of darker eyeshadows and I thought it would be fun to show you how I do a sultry smokey eye, I have made a quick little video on my youtube channel you can click HERE and subscribe 😀

sultrysmokey3

Products;
MAC Paint Pot in Bare Study
MAC Casual Colour Lip & Cheek Colour in Blind Score
MAC Pro Longwear Eye Shadow in More Amour
Morphe 35N Palette (#2 #14 #11 #30 & #35)
L’Oréal False Lash Superstar Mascara
L’Oréal Eyeliner

Prima Lash Lashes in #808
Max Factor Pan Stick #12

Max Factor Pan stick #14 for contour
Mac Diane Kendal Spring/Summer 2017 Concealer palette – lightest
Makeup store Loose powder in pale
Mac Bronzer medium
City Colour Blush Quartet Collection 2 – Orange + Bronze
Gosh Matte Lipstick – Baby Lips

sultrysmokey

Start off by moisturising your face and eye area, I let my moisturiser sit on my skin for at least 5 minutes before starting anything else, letting it sit longer would of course be better. We’re starting with the eyes now because were working with black eyeshadow and the fallout would make your foundation and concealer go grey if we started with the skin. Next I used Mac paint pot in Bare Study to prime my eyelid and all the way up to my brows, it is a pale pink shimmery creme shadow and I used that to get a slight highlight where I won’t be using the dark colours. After the Primer I used a Lip and cheek colour from Mac called Blind score, it is a dark purple colour with a hint of pink in it, this will act as a base colour for the whole look. Next up I used Amour from Mac to add more pink into the crease. Now were moving in to the Morphe 35N palette, I used colour #2 for the brow bone and 11 & 14 for the crease. Lastly I used the black #35 to make it black as hell, then it was all blending, and I spent good 10 minutes on that.
When It comes to this point I take a break from the eyes and start on the face, I used Max Factor Pan Sticks in #12 for the all over coverage and #14 to contour. For my concealer I used the lightest shade in Diane Kendal Spring/Summer 2017 concealer palette, dabbed that under my eyes and down my nose. then I used my L’Oréal eyeliner to line my waterline and tightline, when you are doing smokey you don’t want any skin peeking through. Then I set my foundation all over with the Makeup Store loose powder in pale. I deepened my contour and warmed it up with the Mac Bronzing powder and popped on the 2 blushes from city colour. Now we go back to the eyes! my god this will be a long blog…I applied the Blind Score lip and cheek colour underneath my eyes, then the Amour and finally the black #35 from the morphs palette and blended to connect with my eyelid. I am a big fan of nude lips, wether it being with a bold eye or a simple look I always love a nude lip, so I am going with my fave matte nude colour, the Gosh Velvet Touch Matte in Baby lips, seriously I made a blog about them, they are lovely! Then I just whacked on some mascara and lashes!

sultrysmokey2

I wasn’t too sure about this makeup look at first, you know… the whole fear of using dark colours and whatnot…but Really started to love it the more I went on with it, at the end of the day I really enjoyed taking it off, but I felt fancy AF.

Let me know if there is anything you want me to try out or if you have any questions, id be happy to get a few ideas 🙂

-Ágústa Sif

Plain & Easy Cutcrease <3

Hello!

Now I am back with my first proper blog post since my little 8 month break *happy dance *. I am back now,I have been getting loads of ideas and inspiration  lately for some fun makeup looks and other things that I have been thinking about doing.
But for now we are starting with a very plain, cut crease look, for us who like to wear a lot of makeup this could be a nice natural look, for those who don’t like to wear a lot of makeup this is a really glam look, and its easy to achieve!


plaineasycc

Face:

Mac Matchmaster 1.5 + Body Shop Lightening shade adjusting drops
MAC Diane Kendal Spring/Summer concealer palette (lightest for concealing + 4th for contour)
Makeup Store Loose powder pale
MAC Bronzing powder medium
Pink + orange H&M blushes
ELF pinktastic highlight
YSL Rouge Pur Couture Lipstick in #11

Eyes:

Mac paint pot Soft ochre
Morphe 35N palette
Mac Pigments Kitschmas + vanilla
Maybelline master precise liquid eyeliner
L’Oréal False Lash Superstar
L’Oréal Khol eyeliner 120 immaculate snow
Makeup Store Brow Pomade brunette

I am just going to write down what I did with my eyes, otherwise tis will take forever and I have a pretty basic way of applying my face makeup.

So, I started with the Paint pot, applied it on my lid all he way up to my brows, then I used colour #5 in my Morphe 35N palette to set the paint pot, that way it is easier to blend the darker colours but the colour payoff isn’t the same as if you would add colour strains on to the paint pot (this is good to know) , next I used #1 to add a matte highlight underneath my brows and in my inner corners. Now were getting to the fun bit! To add a bit of depth to my crease and to act as a guide for my darker colours I used #9, this way I can see and make sure I’m not adding dark colour where I don’t want it later on, then went in with #14  which is a light orange colour, that will add some warmth and colour to this look, and it really compliments blue eyes., #? I used to darken the crease and shape it into a “flick”, the last colour I used was #29, a warm, slightly orange brown shade to darken, shape and flick my eyeshadow a little bit. Then I got my paint pot again and applied it on my lid, this is an easy way to do a cut crease without drawing the crease first, on top of that I dabbed MAC’s Vanilla and Kitschmas pigments, glided on a black winged liner, which I hate but I buy it because I love the first 2 times I use it *smh*. with my mascara and threw some Tanya Burr Bambi Lashes on!
Ant Thats it!

Hope you enjoyed that if you have any requests or want to ask me something you can comment below, message me on Instagram or twitter, id really appreciate it if you would 🙂

XoXo
Ágústa Sif

What have I been up to?

Good question…

The last time I blogged was when I did the Tribed makeup look, now that was 8 months ago, I had just finished a big project with the Icelandic Film School, where I went with 20 or more strangers to work at a viking set in Iceland, and we spent 3-4 days filming there sleeping all together in a little summerhouse. I had loads of other projects coming up after that trip, because many of the directors, producers, actors and screenwriters needed a makeup artist for their projects, I was working almost everyday for 12hrs for 2-3 months, it was exhausting but amazing. During that time I made many new friends and I had the best time ever, I never thought working would bring someone so much joy. It was obviously exhausting but great fun at the same time. I didn’t get a decent time off from work until June so I decided to take a long time off to spend with my family and just to recharge my batteries, because I was so tired from all that work (on barely any pay), and since Jökull was off school for 4 weeks I just wanted to focus completely on him for that time as well.

Now I have loads of time on my hands since school has started again and I haven’t booked any work yet, so Im going to use the time to brainstorm, think of some projects and am getting myself back in to blogging. I did do a few makeup looks during my time off, but I mainly posted them on Instagram, Facebook and on my snapchat (itsagustasif) I will however show you a few of them right now! hope you enjoy!


Let me know what you’ve been up to this summer!

xoxo
Ágústa Sif

Tribed <3

fullsizerender-2

Hello again kids.

The past 2 weeks have been absolutely horrendous! First, Jökull was very sick for a week, with a fever and a really bad cough, and now I caught whatever he had! I’ve had a fever, a headache and an earache, my nose is runny and I cough until I gag…ok I think thats TMI! but yeah i’ve been very sick now for the last 4 days.

But yesterday I was feeling a little better than before so I had a little fun with my makeup and did this grunge/ tribal / festival/ geometric whatever this is! I loooove this look, I actually found the black lipstick suit me very well, my parents on the other hand…. hated it haha, no wonder they were born in the late 50’s and wouldn’t understand the fashion of today (mainly black lipstick and weird white shapes) well luckily I am not doing makeup to please my parents or anyone else.

Products I used:

➹ Smashbox Primer Water
➹ MAC Matchmaster 1.5
➹ L.A Girl Pro Concealer Porcelain & Natural
➹ MAC Blot Powder
➹ MAC Matte Bronzer Medium
➹ ELF Pinktastic highlighter
➹ Makeupstore Brow Pomade
➹Unknown blushes pink and orange
➹ Unknown lipstick (I dont know what I applied to my lips, it feels like a lipstick but I think it is a gel liner)

➹ MAC Paint Pot Painterly
➹ NYX Jumbo Eye Pencil Milk
➹ bhCosmetics Galaxy Chic palette (Moon, Asteroid, Cosmic)
➹ Morphe 35N Palette ()
➹ Maybelline Lash Sensational

5 favourite products <3

Hey guys

Today I wanted to go over some of my favourite products at the moment I don’t expect everyone or even anyone to agree with me, but thats how life is! I hope I can summon this list in to a short blog post!


Ebryolisse moisturiser

Smashbox Primer water

Mac Blot Powder

Mac Lipsticks

Mac Prep + Prime Lip base


10 looks with 1 eyeshadow quartet <3


Good evening beautiful people!


Check out my Youtube channel HERE to see the video for this blog post 🙂 

Have any of you had an eyeshadow quartet? These little eyeshadow palettes that many people don’t want because they don’t understand them.
So what is an Eyeshadow quartet? It is a teeny tiny eyeshadow palette that consists of 4 eyeshadows, usually the colours compliment each other and are gradient from light to dark. Many makeup brands offer these in their ranges, you can get these from brands such as MAC, Gosh, Maybelline, NYX and Clarins just to name a few.

Why do I love them? You can do loads of eyeshadow looks with just one quad, they are small and don’t take a lot of space in your vanity/handbag or wherever so they are travel friendly and what I love the most about them is that if you are new at makeup, having one of these is more than enough to start your makeup journey!

I am going to use my MAC Call Of The Canyon quartet from the Vibe Tribe range to show you a whopping 10 looks you can do with quartets, the Vibe tribe Quartets consist of  1 light colour, 1 medium, 1 bright colour and 1 dark shading colour. You can use whatever 4 colours you want for these looks, but keep in mind you might have to change them a little bit.


Look #1 – Everyday Golden Smokey

I would always recommend using 2 shades if you wont be wearing an eyeliner, that way you can create a little bit of dimension and brighten or darken your eyes. For this soft smokey look I used 2 Shades in the Call of the Canyon Quartet, The lightest shade is called “Call Of The Canyon” and the gold shade is called “Fool’s Gold” With this look I used the two lightest shades in my palette, they are Call of the Canyon(Shimmer off white) and Fool’s Gold (Golden shimmery goodness)

Look#2 – Classic Beauty

Here I used the classic 3 shade technique for beauty makeup, its simple its easy and it always looks beautiful, this is my go to method of applying eyeshadow and I have been doing it for 10 years. For this look I used Call of the canyon, Fool’s Gold and Thunderbolt.

Look#3 – Sunset Beauty

With this look I used all four shades in the palette (Call of the Canyon-Fool’s Gold-Thunderbolt-Summer sun), You can really play with this and change it any way you want, You can really get TONS of other looks using the 4 shades, so really I could do a list of 10 -20 looks with one palette! But we’ll have this one do for now 😉 For this look I used the Classic Beauty application and mixed that with the cut crease method.

Look #4 – Classic Smokey

A Smokey eye isn’t always completely black, you can do it in any colour, any opacity and you can definitely add some colour to a black base, which is what I decided to do here 🙂 Thunderbolt and Summer Sun glam! Summer sun doesn’t show up as well as I wanted it to but you can definitely see the orange shimmer.

Look #5 – Halo

I have been quite consistent and classic through this blog post, but now I thought to do something not so common, it is a peachy halo smokey! I used Summer sun and Call of the canyon to do this look and I reaaaally didn’t want to take it off! it is by far my fave look of this blog post! ❤ I might even have to have it as an everyday look because I love it way too much!

Look #6 – The Haze

The haze is a very easy look, I only needed 2 shades to do this, I used Call Of the canyon + Thunderbolt and it is basically a beauty look fused with a smokey look, the outer corners are very dark and smoked out but the inner corners are very light and barely blended.

Look#7 – Cut Crease

I love a cut crease, this style is inspire by the 60’s, when women used to rock a bold cut crease! Do keep in mind that a cut crease will always look better with more colours than I am using here, I only used 1 shade for the crease, but normally I would use 2-4 colours, I think it does look better when using at least 3 shades. But I went on with what I had and made this gold and black cut crease, I used Thuderbolt and Fool’s gold to create it.

Look #8 – Under eye glam

Now this look isn’t rocket science but it is a classic that looks absolutely beautiful on anyone, just choose a colour that suits you (or whatever colour you want) and pat it underneath your lashline! Make sure you have your eyelids in neutral tones so that colour really pops.

Look #9 – Dark in the corners

This look is not really for the faint of heart, its a very very bold look for people who don’t have a wide set of eyes, and is very often used in fashion. If you have wide set of eyes (they are far away from each other) this look will suit you very well, this is when the darkest shade, or the most saturation of the colour is in the corners of your eyes and is blended up to your brows.

Look #10 – Sinner V

The Sinner V is when you place a bright colour in the corners of your eyes, this look is really cool and is a good alternative when you want a pop of colour just not in the traditional under the eye type of way. For this look I used 3 shades in the palette, Summer Sun, Fool’s Gold and Thunderbolt.


And that’s IT! whew… that was almost like a workout! It took me about a week to do all the work for this blog and the video… an I had to do one of the looks TWICE because I accidentally deleted the files and pictures! So yes a like and a share would definitely be appreciated! but dayumn it was so much fun! I could have gone on and on with this post but I think 10 looks are enough for now! Have you ever had one of these quartets and not known how to use them? I used to!

Let me know what you thought of this post! I hope you have a great day! and also lets share ideas on future  blogs!

xoxo Ágústa Sif

MOOD Makeup School | Week #8 & Graduation <3

That’s it… it’s over…

Hiiiya!

Weeell where to start ? lets start with, i’m so sorry I haven’t blogged properly in a while, i’ve just been catching up with some quality time with the family and trying to chill out a little! I also didn’t want to do this last blog post until I actually wen’t to my graduation. But the last 8 weeks have been the most fun I’ve had in my life for a while, it was a struggle, managing 2 schools, a home and a disabled child, but it worked! I made it work! As you probably know by now … well I hope otherwise you might have some kind of a reading difficulty.. I am blogging about my last week at makeup school. From day 1 I’ve been putting all my effort in to this and learning new things everyday, and now its over, yes over the weekend I had my tests, and now I am obviously not going to MOOD anymore 😦 Im already missing the girls and my teachers! But new adventures are ahead. Lets talk about the week shall we ?

Monday- SPFX
Eygló, the founder and owner of the school showed us the basics of SPFX makeup,we played around with liquid latex, many different types of fake blood and sweat! We also talked alot and shared weird and funny stories, I almost got a six pack after all the laughter!

Tuesday- Modern era
Remember when I was doing the 20’s – 90’s, well on Tuesday we had to choose one of those eras and recreate a look from that era, but put it in to a modern style! Ofc I went with the 60’s, because it is very popular right now … cut crease …. duh. My little cousin Eydís modelled for me ❤ bless her heart, she is such a cute little thing!

Wednesday- Practicing for Finals!
Our last day of class, we didn’t need to learn anything, we got to practice for our final exams! So we got to do and fine tune the look we’ve been thinking about for 8 weeks, Eydís came over again and modelled for me! you would think it would be easy to find models for this, but I struggled a few times!

Saturday & Sunday 22-23rd of October
Over the weekend we had our finals, it was probably the most stressful days I have ever experienced, on Saturday we had our Beauty test, I did a good job I belive but I didn’t leave enough time to do the hair as I planned, so I just put it in a pony with a twist. On Sunday we did our fashion test, which was a lot easier than the beauty test, in the fashion test you have fewer rules to follow and can go wild with your imagination and creativity, I decided to do a gold and magenta look, these two days were crazy AF! I actually kind of loved it, it kept me busy and I was doing something I love to do!


Graduation- 4th of November 2016
What a time we’ve had! I am so thankful for the girls in my group, they are all such beautiful souls, It was nice to be a part of something again, On friday we all went to MOOD and had a few drinks and a catch up after 2 weeks apart! We then got our diplomas and headed to Sæta Svíni for Drinks and a meal! It was amazing! check out my facebook page [Ágústa Sif – MUA]for a video from that night!


What’s next for me? Well I don’t know, I have been doing some freelance work since school finished, I guess I will still be doing that, Im also going to be blogging, I wont quit that, I like writing… strangely haha. I think this is going to be it for now, I will be back next week with a new blog post 🙂 seeya then!


XoXo Ágústa Sif …. Makeup Artist!

Marble Eyeshadow <3

img_8607

Hey Kids!

Well don’t I have a treat for you guys? I tried to do a marbled eyeshadow look, It didn’t go as well as I hoped but I am still impressed with how cool it looks! I do want to warn you thought, It is very time consuming, and you have to just let the small things go, I did the glittery eye first, and I took so long to do it I wasn’t going to do the other one, but I was running late and I didn’t want to take my makeup off, so I just went for it and did a much quicker version of the first eye. This isn’t an everyday look, but my gosh does it turn some heads!

✎ Grimas Creme Face Paint – White

✎ NN Cosmetics palette #1 Row #1 Colour #1

✎ MAC Eye Kohl – Smoulder

✎ NN Cosmetics palette #1 Row #1 Colour #3

✎ NN Cosmetics palette #1 Row #1 Colour #6

✎ NN Cosmetics palette #1 Row #10 Colour #3

✎ NN Cosmetics palette #1 Row #10 Colour #4

✎ MAC Pro Longwear Fluidline – Blacktrack

✎ Max Factor 2000 Calorie Mascara

✎ Silver glitter

Hope you liked it!

xoxo Ágústa Sif